What is a MDI file? MDI stands for Microsoft Document Imaging, which is a proprietary image format from Microsoft. Scanned images are stored using this format. One needs to have Microsoft Office Document Imaging installed in the computer to open and view files with MDI extension. This is an application that comes along with the MS Office suit.
The issue with this application is that it gets installed automatically along with Microsoft Office 2003 suit; however, the same is not true with the later versions of the software. My problem was that the file I wanted to view was created in a computer running MS Office 2003 and I am running MS Office 2007 in my computer. Hence, to open MDI Files in Microsoft Office 2007, I had to install that application in my computer. Once done, it opened smooth and I could print!
Let me tell you how you can install Microsoft Office Document Imaging in your computer, running on MS Office 2007. The steps are simple, but most users would find it little difficult since there are some steps involved in that. Hope I can explain the steps better here.
Operating System: MS XP
Office version: 2007
To view MDI Files in Microsoft Office 2007 we need to first install the application.
To do so follow the steps below:
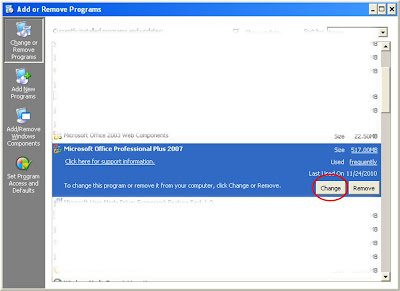
1. Click on Start.
2. Click on Control Panel.
3. Double Click the Add or remove programs icon.
Alternately, type appwiz.cpl in Start > Run and hit Enter.
4. As the dialog box comes up, select Microsoft Office 2007 (as per the version installed in your computer).
5. Click on Change button.
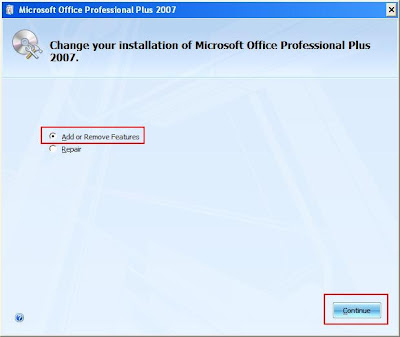
6. You will get a dialog box from MS Office asking you to either add or remove features, repair and uninstall (may not be present in all computers).
7. Choose Add or Remove features option, and click Continue.
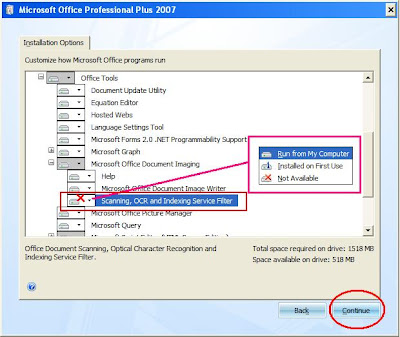
 8. In the next screen expand Office Tools, by clicking on the small plus sign.
 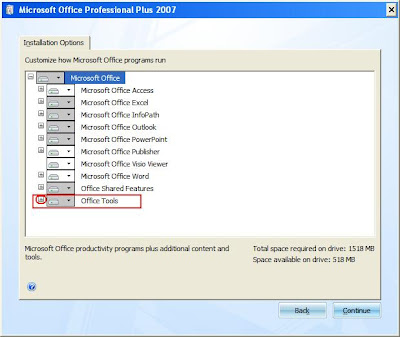 9. Similarly, expand Microsoft Office Document Imaging option, inside Office Tools.
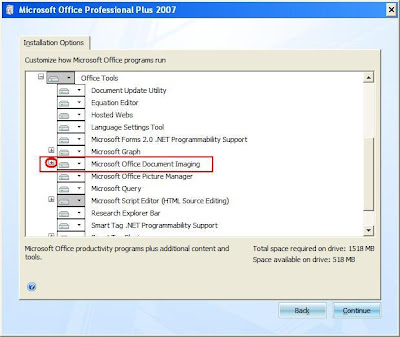
10. Now, choose Scanning, OCR, and Indexing Services Filter, and then click on the small down arrow.
11. Select Run from My Computer option and click on Continue.
This will start configuring your computer and installing the application and you will see a screen like this:
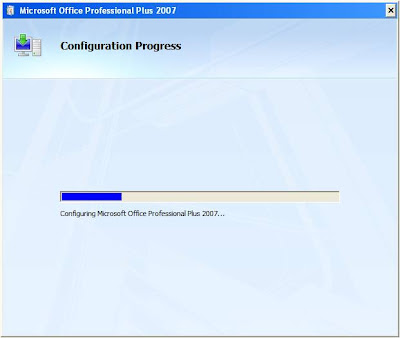
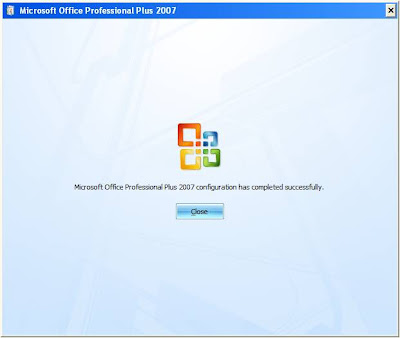
This ends the installation.
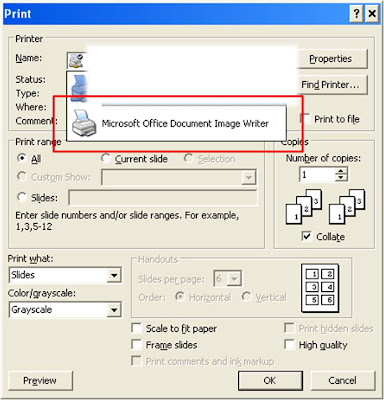
Now, to check whether the installation was successful, try printing any document. You will find an additional item named, ‘Microsoft Office Document Image Writer’ as a virtual printer installed along with the pre-installed printers in your computer. This confirms that the application is installed and now you can print any document and save it with .MDI extension. On top of that, you may now open any MDI files sent to you from any other computer.
This thing is very helpful, when you collect documents from the internet and want to print it later. Also, you may use this when you want to move a document to another computer before you would like to print. This will save you some time and would result in a nice printing solution. Now you know how to open MDI Files in Microsoft Office 2007 and you need not run around searching for computers or applications that can open and MDI file.
For a detailed article on MDI file formats and the above steps in computers with other versions of MS Office, please see this web document from Microsoft.
Hope you liked this post. We appreciate your comments. Please feel free and let us know if this was helpful. Merry Christmas. Enjoy!


0 Reviews:
Post a Comment